
I am using the wonderful art of Marianne Mathiasen which can be purchased HERE
You will require the following things to do this tut:
I am using Paintshop Pro 9 and animation shop which can be purchased HERE
DSB Flux HERE Or HERE
The tut Kit HERE
Unzip the kit and take the template masks and the lips or butterflies and the word dart to psp.
This tut i am using the maskskdoty1410 but I have provided you with items to turn this into a hearted one if you chose.
Now we are going to begin once you have all the items opened in psp.
On the template click the raster 8's eye and the copyright layer.
Now merge all rasters.
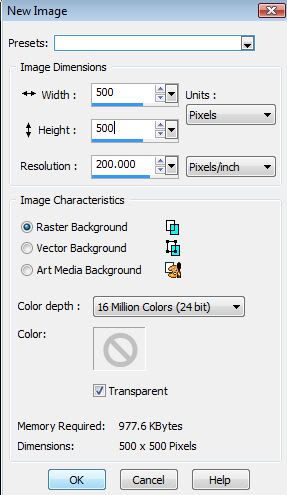
Open new Image 500 x 500 pixels.
Copy and paste in new image as a new layer. and exit the template.
Now pick two colors from the tube. I have chosen the two light colors.
Take your magic wand and select a square and or two and flood with one of the colors. right click to deselect them.
Now pick one or two squares/or/rectangle and select with your wand again and flood with the other color.
Now go back to your tube and select two more colors if your tube doesnt have that many colors you can pick two colors that you like that goes with the tube.
once you have done the coloring now comes the fun.
Right click so your nothing is selected now go to selection>select all, then go back to selections and click float, Now go back and defloat. Now go back to selections>Modify>contract 8. Now go back to selections>invert.
Now right click on the raster in the layers section off to the right and go to promote selection to layer. Now go to selections and click on select none.
Now got to effects>3d effect>inner bevel see below to see my settings:

Now go to effects>3d effect>drop shadow. see below to see my settings

Now copy and paste your tube as a new layer place where you think will look nice. ( you may have to resize it a little just make sure you have smart size in your resample using section)
Now duplicate the tube and move to the bigger square now click on the raster that the template is and select with your magic wand the big square then clcik on the raster of the tube that you moved to the square and promote seletion to new layer. now click on the raster layer section and you can either lower the occupancy to 70% or you can change the layer blend mode see below image to see where you have to click now click on luminance(legacy)


Now move the duplicated tube and resize until it can fit in the middle of the small middle square above the big square. now click on the raster layer section and you can either lower the occupancy to 70% or you can change the layer blend mode (See images above) to see where you have to click now click on luminance(legacy)
Now on to the butterflies you may change the color to fit the tag colors. copy and paste as new layer the butterflies under your main tube and resize and place the where you will in the little squares above the big square. now click on the raster layer section and you can either lower the occupancy to 70% or you can change the layer blend mode (See images above) to see where you have to click now click on luminance(legacy)
Now click the eye on the main tube and the bottom raster and remove the duplicated tube from the tag. Now merge visible
Now paste a new layer of each butterfly and resize and place them where you want them add drop shadow. Now click the eye on the merge layer and merge visible.
Uncheck the all layers except the tube layer.
Now copy and paste as a new layer the word dart and resize to fit in the blank spot I have the words above the butterfly layer. you may add a white drop shadow behind it or change the color. NOw go to the bottom raster and flood white and add a new raster layer.
Now take one of the light colors from the tube and go a shade lighter and flood the new layer.
While still on that layer go to the layer section to the right and click on the area where it is highlighted and click and select New Mask Layer>From Image>select the mask you are using Source Luminance and invert mask data are selected then click okay lower occupancy to 70% then merge down.
Merge the squares down to that layer. Click on the top layer and add your copy right information if your using PTU make sure you use your Licence number.
Now add drop shadow to your tube layer merge copy right and word dart and tube layer together.
You should have three layers now the tube layer the butterfly layer and the template layer with the mask. Now click on the butterfly layer. Go to effects>plugins>dsb flux>bright noise: 45 intensity direction lighter. Add drop shadow.
If you do not want to make the tag animated you are finished so you can save as a psp so you can offer the tag up or just go ahead and add a name and your done.
Animation setion:
Open animation shop
Now click on the butterfly layer. duplicate twice so you have three layers. Click the bottom butterfly layer and go to Adjust>add/remove Noise>Add noise My settings (see below)

Now go to the next butterfly layer up and change the setting to the uniform.
Now go to the next butterfly layer up and change the setting to the random.
Now hit the eye on the two top layers of butterflies and merge copy and then paste as new image in animation shop.
go back to paintshop pro and click the eye on the first layer of butterfly and uncheck the second layer and merge copy and go to animation shop and right click on the animation and paste after.
go back to paintshop pro and click the eye on the second layer of butterfly and uncheck the third layer and merge copy and go to animation shop and right click on the animation and paste after.
Now select edit in animation shop and select all now go back to edit and select propagate paste now go back to psp and click on font and type in the name you like and copy and go back to animation shop and right click in the middle of the tag on the first frame and paste into selected frame move until you have the name place where you like and then left click and it should go all the way through the animation now save as and you can save it with out a name so you can offer it up as a tag when you like. I hope you enjoyed this tut I would like to see what you made I have a web where i can post the tag. This tut is my own making if it looks like someone else's it pure coincidental.


No comments:
Post a Comment